
Home-built Photography Light Tent – Part 1
Many of my friends know that I’m an aspiring amateur photographer. While I’m currently of the school of thought “accuracy by volume,” I am working to get good enough to always take quality pictures the first shot (I still have a ways to go…). Part of getting better is experimenting and getting more equipment to help in my pursuit.
The newest addition to my equipment inventory is a light tent (or light box) for taking cleanly lit close-up pictures of small to medium sized objects. I’ve been toying with the idea of buying one for a few years, but have been on a DIY kick for a while and decided to just go out and build one for myself.
Part one of this post will cover the construction of the frame, while part 2 will cover the construction of the light diffusing fabric panels on the sides of the tent.
As with many of my projects, the original idea is not new; you can easily Google “DIY light tent” or “light tent” to find a number of projects building similar devices. A few of the websites that I follow (MightyOhm and Strobist) have even gone the DIY route for their light tents.
My goal for this build was to keep it relatively simple, able to be broken down and stored easily, and to build something a little more customizable than ones I had seen elsewhere.
Design
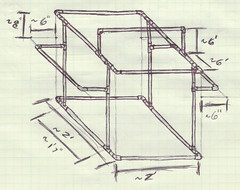
The light box that I decided to build is roughly 2′ by 2′ by 2′ without the added arms attached. I wanted to add optional arm extensions to the box so that lights and flashes can be easy clamped to the structure. With the arms attached, add roughly an extra 1′ wide by 1/2′ tall for a total of 3′ wide by 2′ deep by 2 1/2′ tall.
Parts List
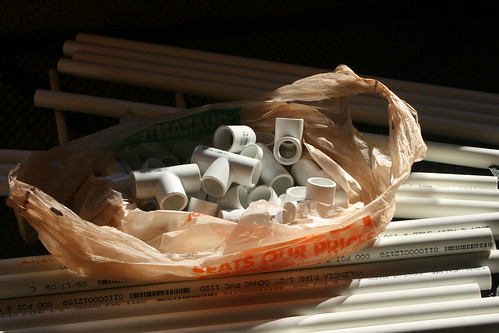
- (16) – 2′ lengths of 1/2″ PVC pipe – $0.75 each
- (14) – Right angle 1/2″ un-threaded fitting – $0.25 each
- (14) – 3-way/ ‘T’ 1/2″ un-threaded fitting – $0.27 each
- (2) – clamp-on utility lamp – $5.47 each
All hardware parts for the frame should be able to be found in any of the major home-construction type stores and should cost about $30.
Assembly
First – cutting the pieces

Make all cuts to the PVC at the same time to save time. Where I state to mark a pipe with a letter, it’ll work best if you place that marking in small text close to the ends of the pipe lengths. Produce the following pieces:
- Keep 5 of the pieces the full 2′ length and label them as part ‘A.’ A few of the ones that I bought were close enough to the 2′ length, but most were almost 1/4″ longer and were more ideal for cutting.
- Cut four pipe lengths to be 19″ long – mark these as ‘B’
- Take two of the scraps from those cuts and trim them to 5″ – mark these as ‘C’
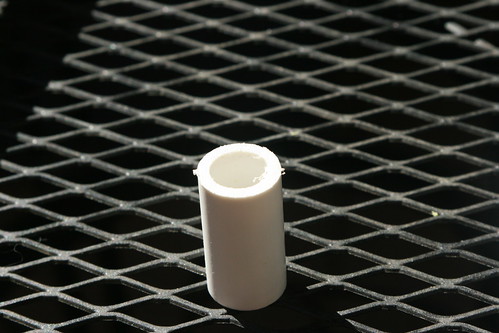
- Take the other two scraps and cut four 1 1/2″ lengths out each of them – mark these as ‘D’
- Cut four of the pipes into 14 7/8″ long pieces – label them ‘E’
- Cut four 8″ pieces from the scrap of those last cuts – label them ‘F’
- Cut two of the pipes down to 12 7/8″ lengths – label them ‘G’
- Cut two pieces from those scraps to be 6″ long – label them ‘H’
- Take one last pipe and cut it into four pieces that are 5 7/8″ long – label them ‘I’
Make sure you keep track of all of these lengths, or else you’ll find yourself taking another trip to the store.
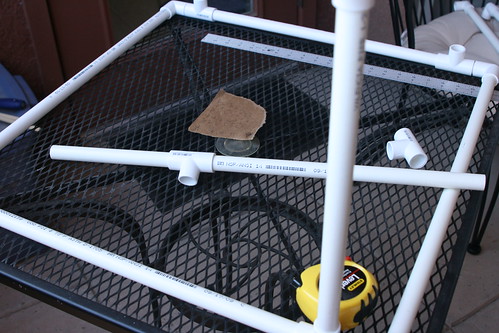
Second – assemble the base
The base consists of four right-angle fittings, four “T” fittings, four pipe length D’s, two pipe length A’s, and two pipe length B’s.
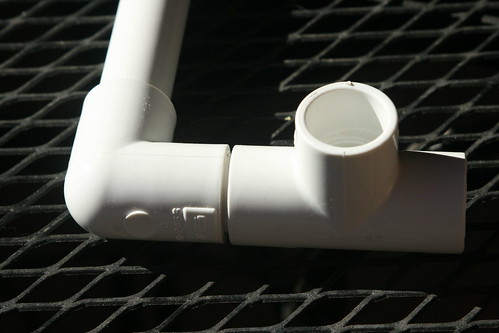
- Put the four right angle fittings on both ends of both pipe A’s
- Put the four small part D pieces into each of the right angle fittings
- Put the four “T” fittings onto the small D pieces
- Complete the base by putting the B pieces into the the T’s to form a square with the A pieces
Third – assemble the vertical supports
In my design, I wanted the side light bars to be roughly 1/3 of the way from the top/bottom, which is where I got the measurement for pipe ‘F:’ 1/3 of 24 inches is 8 inches. You can make this piece either the lower portion of the vertical support or the upper portion to adjust the height of the side light bar.
- Place one ‘F’ piece into each of 4 new “T” fittings
- Put the four ‘E’ pipes into the opposite end of the “T” fittings
- Place either end into the “T” fittings in the base and you’ve got your vertical support bars
If, when building your own, you decide you want a different height position for the side bars, consider that the only constraint I used in picking my lengths was to keep the entire vertical support to 24 inches long.
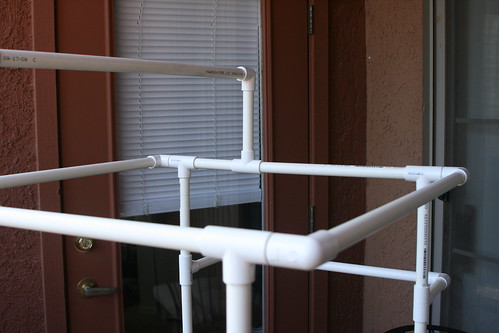
Fourth – assemble the top
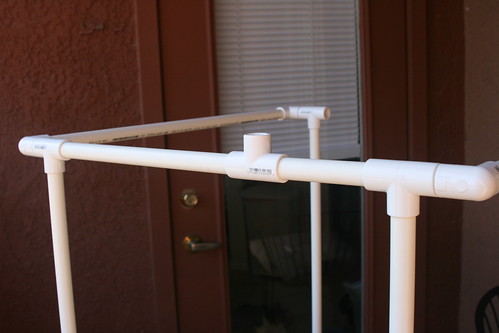
The top is very similar to the base of the light box, with the exception of having an extra set of brackets for the top light bar. I wanted to use as many of the left-over pieces from the project as I could, which is why the light bar has a pair of 5″ pieces (part ‘C’): they were left over from cutting the 19″ lengths. For the top, you will also need two pipe ‘A’ pieces, four right angle fittings, four ‘D’ pipes, four “T” fittings, and two pipe ‘G’ pieces.
- Build up two sides similar to the base: Put a 90 degree piece on each end of the two “A” pieces. Put the small ‘D’ pipes in the other sides of the 90’s, and then put “T” fittings on the ‘D’ pipes
- Take both pipe ‘C’ pieces and place the new “T” fittings on one end so that there is a connection 90 degrees off from the pipe and another 180 degrees off
- Place the pipe ‘G’ pieces into the “T” fittings in opposition of the ‘C’ pieces
- Connect the other sides of ‘C’ pieces to the “Ts” attached to the ‘D’-‘A’ side pieces
- Place the other ‘G’ ends into the other ends of the side pieces to build the square
- Orient the side piece “T” fittings down and connect them with the vertical supports
As with the vertical supports, you can customize where you want the light bar to be in the top piece. To customize the bars, the only real constraint (other than my self-imposed one to maximize use of already cut pieces) is that the overall length of the side bars be 19 inches (approximately from vertical “T” to vertical “T”).
Fifth – assemble the light support structures
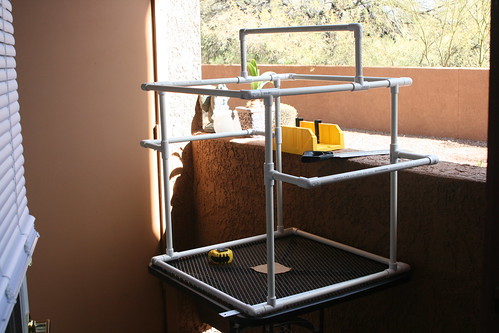
I designed multiple structures on the light box to allow different combinations and positions of lamps. The two side support pieces consist of two 90 degree fittings, one ‘B’ pipes, and two ‘I’ pipe lengths each. The top support piece takes two 90 degree fittings, one ‘A’ pipe, and the two ‘H’ pipes. For each of the supports do the following:
- Take the long pipe (either ‘A’ or ‘B,’ top or side pieces respectively) and place a 90 degree fitting on each end
- Take the shorter pipe pairs (either ‘H’ for the ‘A’ pipe or ‘I’ for the ‘B’ pipe) and connect them to the 90 degree fittings
- Connect the shorter support bars to the vertical pipe “T” fittings.
- Connect the longer support bar to the top support “T” fittings
Done!

And with that last step complete, you have a functional light box frame that you can attach lights to in just about any conceivable configuration needed. When you are done taking pictures and want to break down the tent, it quickly comes apart and is a little larger than a tripod.
Read part 2 directions on creating the fabric diffusing panels.
To see more pictures from the build, check out my flickr photo set for this project.
Tags: diy, light tent, photography